Homemade Red Velvet Brownie Recipe
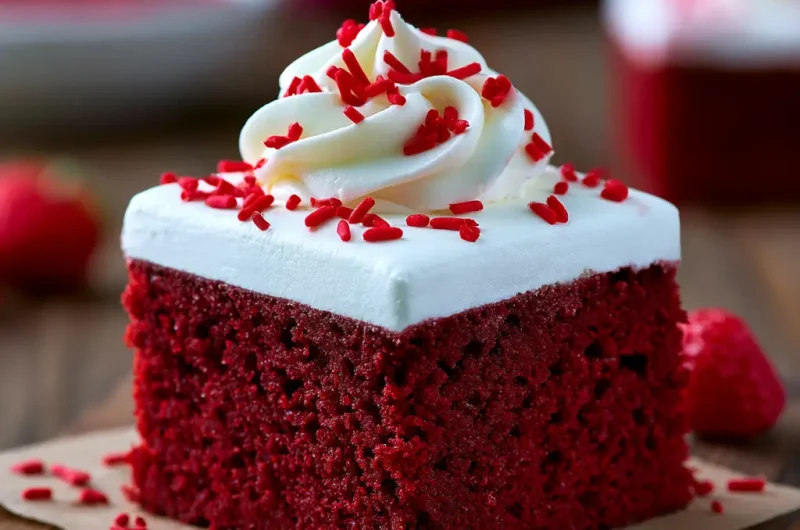
Nothing feels more comforting than biting into a rich, fudgy homemade red velvet brownie with its beautiful crimson color and subtle cocoa flavor. This classic dessert combines the soft, chewy texture of traditional brownies with the signature taste of red velvet cake, creating a treat that looks as impressive as it tastes. Whether you are baking for Valentine’s Day, Christmas, birthdays, potlucks, or simply satisfying a chocolate craving, this homemade red velvet brownie recipe never disappoints.
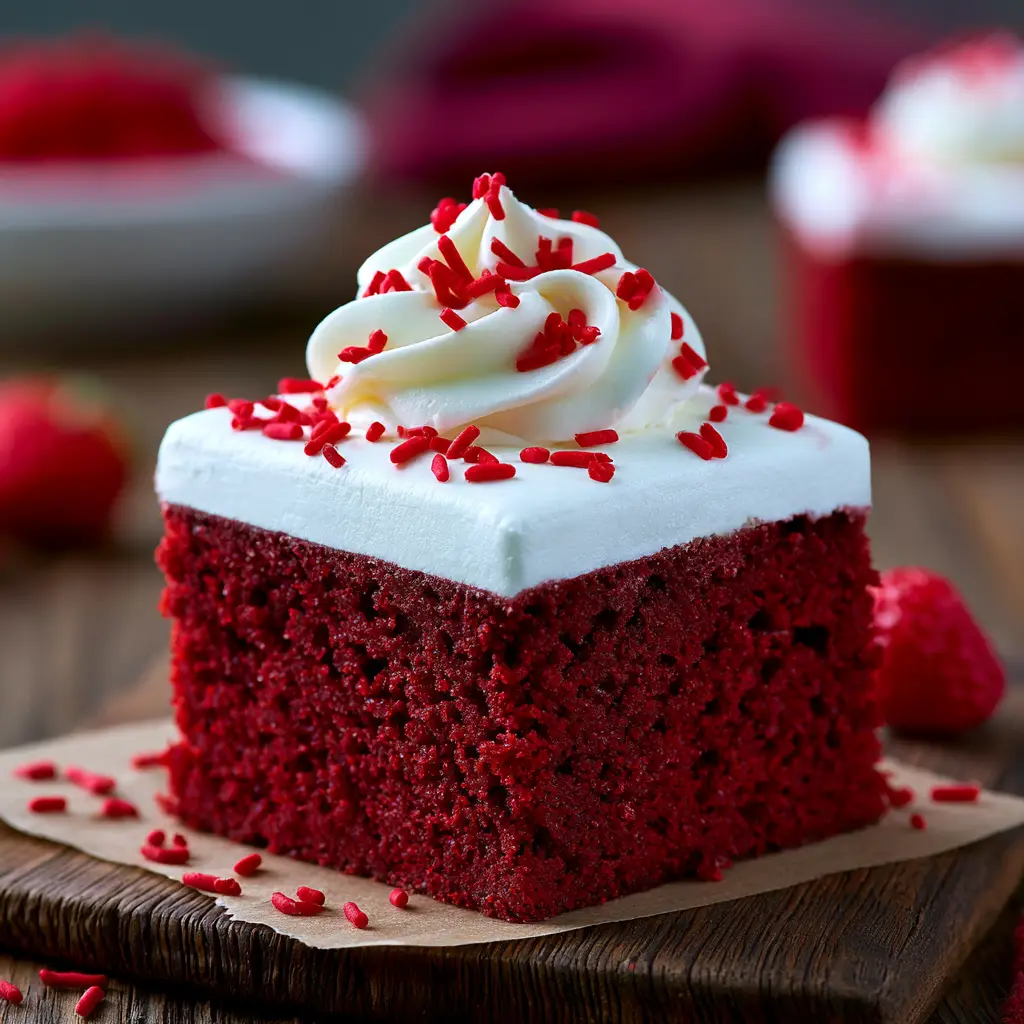
The best part is that these brownies are easy to make using simple pantry ingredients. Every bite is dense, moist, and packed with chocolate flavor while maintaining the unique tanginess that makes red velvet desserts so special. Pair them with cream cheese frosting for an extra indulgent finish or enjoy them plain with a glass of cold milk.
If you have been searching for the perfect homemade red velvet brownie recipe that delivers bakery quality results every time, this recipe is exactly what you need.
Ingredients List
- 1 cup unsalted butter, melted
- 1½ cups granulated sugar
- 2 large eggs
- 1 egg yolk
- 2 teaspoons vanilla extract
- 1 tablespoon red food coloring
- 1 teaspoon white vinegar
- 2 tablespoons unsweetened cocoa powder
- 1½ cups all purpose flour
- ½ teaspoon salt
- ½ teaspoon baking powder
- 1 cup white chocolate chips (optional)
Serving Prep Time Cooking Time Calories
Serving: 12 brownies
Prep Time: 15 minutes
Cooking Time: 30 minutes
Total Time: 45 minutes
Calories: Approximately 340 calories per serving
Why You Will Love This Recipe
This homemade red velvet brownie recipe is perfect for both beginner and experienced bakers.
It creates incredibly fudgy brownies with a rich chocolate flavor.
The vibrant red color makes them ideal for holidays and celebrations.
Simple ingredients are easy to find in any grocery store.
They stay soft and moist for several days.
The recipe is easy to customize with different mix ins.
Perfect for gifting, parties, bake sales, and family desserts.
Step By Step Instructions
Preheat your oven to 350 degrees Fahrenheit. Grease an 8 by 8 inch baking pan or line it with parchment paper.
In a large mixing bowl, whisk together the melted butter and granulated sugar until smooth.
Add the eggs and extra egg yolk one at a time, mixing well after each addition.
Stir in the vanilla extract, white vinegar, and red food coloring until fully combined.
Mix the cocoa powder into the wet ingredients until evenly blended.
In another bowl, combine the flour, salt, and baking powder.
Gradually fold the dry ingredients into the wet mixture using a spatula. Mix only until no dry flour remains.
Fold in the white chocolate chips if using.
Pour the batter into the prepared baking pan and spread it evenly.
Bake for 28 to 32 minutes or until a toothpick inserted in the center comes out with a few moist crumbs.
Allow the brownies to cool completely before slicing into squares.
Serve plain or top with cream cheese frosting for an extra decadent dessert.
Variations To Try
Add dark chocolate chunks for extra richness.
Mix chopped pecans or walnuts into the batter for crunch.
Swirl cream cheese into the brownie batter before baking.
Add mini marshmallows during the final few minutes of baking.
Top with crushed Oreo cookies for extra texture.
Drizzle melted white chocolate over cooled brownies.
Add festive sprinkles for holiday celebrations.
Freezing Or Restoring
These brownies freeze beautifully for future desserts.
Allow the brownies to cool completely before wrapping each piece individually in plastic wrap. Store them inside a freezer safe container or zip top freezer bag for up to three months.
To enjoy again, thaw at room temperature for one to two hours.
For a freshly baked taste, warm each brownie in the microwave for about 15 seconds before serving.
Store leftovers in an airtight container at room temperature for up to four days or refrigerate for up to one week.
Recipe Notes
Use room temperature eggs for a smoother batter.
Avoid overmixing to keep the brownies soft and fudgy.
Do not overbake because brownies continue cooking as they cool.
Use gel food coloring for a deeper red color.
Measure flour accurately to prevent dry brownies.
Allow the brownies to cool before cutting for cleaner slices.
A plastic knife works well for cutting neat brownie squares.
Homemade Red Velvet Brownie Recipe
12
servings15
minutes30
minutes340
kcalIngredients
1 cup unsalted butter, melted
1½ cups granulated sugar
2 large eggs
1 egg yolk
2 teaspoons vanilla extract
1 tablespoon red food coloring
1 teaspoon white vinegar
2 tablespoons unsweetened cocoa powder
1½ cups all purpose flour
½ teaspoon salt
½ teaspoon baking powder
1 cup white chocolate chips, optional
Directions
- Preheat the oven to 350°F and prepare an 8 by 8 inch baking pan by greasing it or lining it with parchment paper.
- In a large bowl, whisk melted butter and sugar together until smooth and well combined.
- Add eggs and egg yolk one at a time, mixing well after each addition.
- Stir in vanilla extract, red food coloring, and white vinegar until the mixture is evenly colored.
- Add cocoa powder and mix until fully incorporated.
- In a separate bowl, combine flour, salt, and baking powder.
- Slowly add the dry ingredients to the wet mixture and gently fold until just combined.
- Mix in white chocolate chips if desired.
- Pour the brownie batter into the prepared pan and spread evenly.
- Bake for 28 to 32 minutes or until a toothpick inserted in the center comes out with a few moist crumbs.
- Allow the brownies to cool completely before slicing and serving.
Recipe Video
Notes
- Do not overmix the batter because it can make the brownies less fudgy.
Avoid overbaking to keep the brownies soft and moist.
For a richer flavor, use high quality cocoa powder and vanilla extract.
Cream cheese frosting makes a delicious topping for these brownies.
Store leftover brownies in an airtight container at room temperature for up to 4 days.
These brownies can be frozen for up to 3 months when wrapped properly.
FAQs
Can I make these brownies ahead of time?
Yes. They actually taste even better the next day after the flavors have developed.
Can I use natural cocoa powder?
Yes. Unsweetened natural cocoa powder works perfectly in this recipe.
Can I add cream cheese frosting?
Absolutely. Cream cheese frosting pairs wonderfully with red velvet brownies.
How do I know when the brownies are done?
Insert a toothpick into the center. It should come out with a few moist crumbs but not wet batter.
Can I make these brownies gluten free?
Yes. Substitute a good quality one to one gluten free flour blend.
Why are my brownies dry?
Overbaking or adding too much flour can make brownies dry. Measure carefully and remove them from the oven as soon as they are done.
Conclusion
This homemade red velvet brownie recipe is the perfect combination of rich chocolate flavor, soft texture, and beautiful color. Easy to prepare with everyday ingredients, these brownies are ideal for holidays, family gatherings, bake sales, or simply treating yourself to a delicious homemade dessert. Whether you enjoy them plain, topped with cream cheese frosting, or served with vanilla ice cream, these fudgy brownies are guaranteed to become a favorite in your kitchen. Make a batch today and experience the irresistible taste of homemade red velvet brownies.